Easy No-Bake Chocolate Peanut Butter Balls: Your 5-Ingredient Secret Weapon
Craving that iconic sweet and salty bliss of a Reese's Peanut Butter Cup, but want something homemade, effortlessly easy, and ready in a flash? Look no further than these incredible No-Bake Chocolate Peanut Butter Balls! Requiring just 5 simple ingredients and absolutely no oven time, this recipe is a game-changer for anyone seeking a quick, satisfying treat that delivers big on flavor with minimal effort. If you're a true Reese's Lover, you absolutely need to make these addictive no-bake PB balls today!
Whether you're planning a party, looking for a thoughtful homemade gift, or simply want to treat your family during the holidays or any special occasion, these delightful *chocolate peanut butter balls* are your answer. They boast the perfect ratio of creamy, rich peanut butter filling to a luscious, snappy chocolate coating, guaranteed to satisfy even the most intense peanut butter cravings. But be warned – they're so utterly addictive, you might just find yourself needing to make a double batch!
Why These 5-Ingredient Chocolate Peanut Butter Balls Are a Must-Try
What makes these no-bake wonders so universally adored? It all comes down to a perfect symphony of textures and flavors, coupled with an unbeatable ease of preparation:
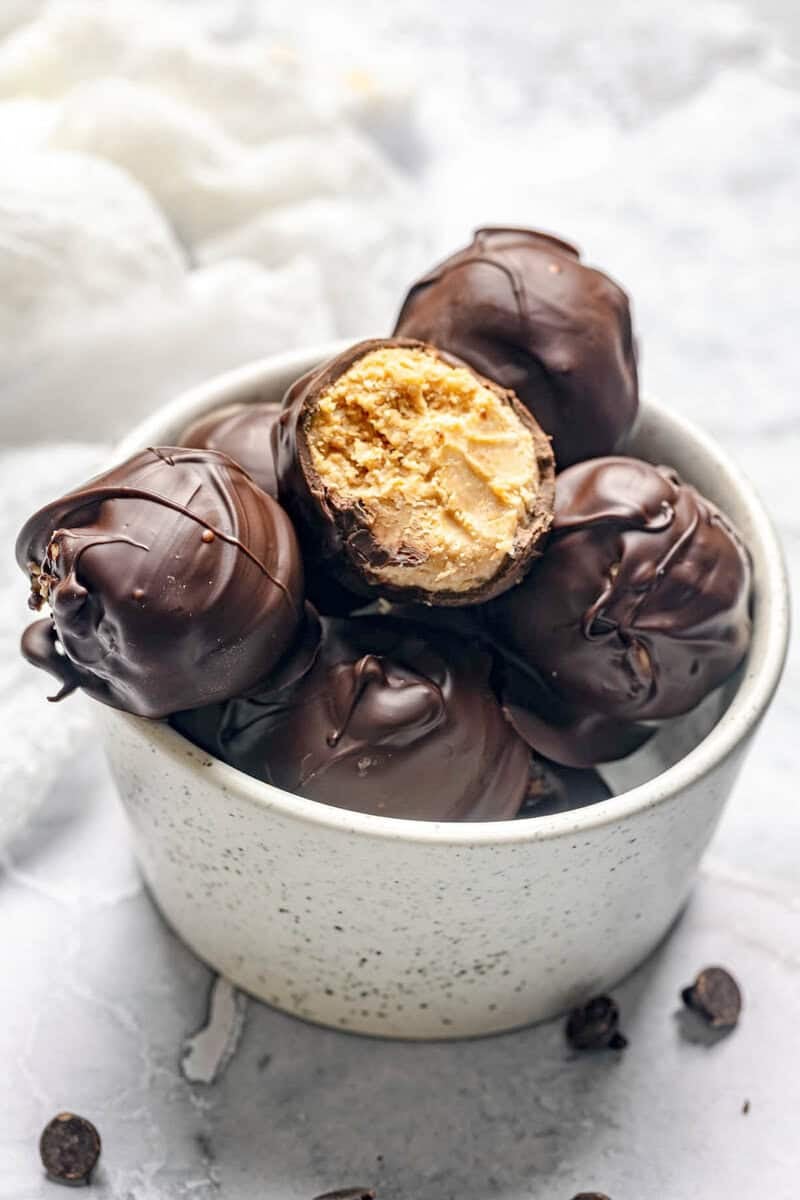
- Unrivaled Flavor Balance: The magic lies in the ideal harmony between the sweet, salty, and utterly creamy peanut butter interior and the decadent, slightly bitter, or sweet chocolate shell. Each bite offers a delightful contrast that dances on your palate.
- Perfect Texture Harmony: The combination of peanut butter, powdered sugar, and butter creates a smooth, moldable center that holds its shape beautifully when chilled, yet melts in your mouth upon impact. The chocolate coating then provides that satisfying, crisp snap, enhancing the overall experience.
- Effortless & Accessible: The "no-bake" method is a dream come true for bakers of all skill levels – from kitchen novices to seasoned pros short on time. Forget preheating ovens or complex techniques; if you can mix and melt, you can master these.
- Simple Ingredients, Big Impact: With just five core ingredients, the natural, comforting flavor of peanut butter truly shines through. There are no complicated additives to mask the star of the show, resulting in a pure, nostalgic taste that feels both familiar and gourmet.
- Versatile & Make-Ahead Friendly: These treats are not only quick to prepare (less than 30 minutes of active time!) but also hold up wonderfully, making them ideal for prepping in advance for any gathering. Their elegant appearance belies their simple creation, ensuring they're always a hit on any dessert platter.
Your Simple Shopping List: Just 5 Essential Ingredients
The beauty of this recipe lies in its minimalist approach. You likely have most of these staples in your pantry already! Here's what you'll need:
- Creamy Peanut Butter: This forms the rich, smooth, and utterly delicious base for your candy centers. For best results, we highly recommend using a stabilized creamy peanut butter brand (like Jif or Skippy). Natural peanut butters, while delicious, can be oilier and sometimes lead to a greasier or less cohesive ball, making them harder to work with.
- Powdered Sugar (Confectioners' Sugar): Essential for sweetening the peanut butter mixture and, crucially, helping to bind it into a smooth, pliable dough-like consistency that’s easy to roll and holds its shape perfectly.
- Unsalted Butter: Adds a luscious richness to the peanut butter filling and helps create that wonderfully smooth, moldable texture. Using unsalted butter gives you better control over the overall saltiness of your treat.
- Chocolate Chips: The classic coating that everyone loves! You can choose your favorite: semi-sweet for a balanced flavor, milk chocolate for extra sweetness, or dark chocolate for a more intense cocoa hit. High-quality chocolate chips will give you the best melt and flavor.
- Shortening: This is the secret ingredient for a smooth, glossy, and professional-looking chocolate coating that sets beautifully and avoids cracking. Just a small amount helps the chocolate melt smoothly, become easier to dip with, and provides that desirable snap when bitten into. (Solid coconut oil can also be a good substitute for a similar effect).
Crafting Your Perfect Chocolate Peanut Butter Balls: Step-by-Step Guide
Let's get those hands dirty (but not for long!) and create these irresistible treats.
Step 1: Prepare the Peanut Butter Base
In a large mixing bowl, combine the creamy peanut butter, powdered sugar, and softened butter. Using an electric mixer on low speed or a sturdy spoon, mix until a cohesive, dough-like mixture forms. It should be soft but firm enough to roll. Chef's Tip: Be careful not to overmix, as this can lead to a greasier texture. Mix just until combined and smooth.
Step 2: Form and Chill
Using a small cookie scoop or your hands, roll the mixture into small, bite-sized balls, typically about 1 to 1.5 inches in diameter. Arrange the peanut butter balls on a parchment-lined baking sheet. This chilling step is absolutely crucial! Refrigerate them for at least 2 hours to allow them to firm up completely, or for faster results, freeze for 30-60 minutes. This will prevent them from falling apart when dipped in warm chocolate.
Step 3: Melt the Chocolate Coating
In a microwave-safe bowl or using a double boiler, combine your chocolate chips and shortening. If using a microwave, heat in 30-second intervals, stirring thoroughly after each interval, until the mixture is completely smooth and glossy. If using a double boiler, stir continuously until melted and fluid. Avoid overheating the chocolate, which can cause it to seize.
Step 4: Dip and Coat
Remove the chilled peanut butter balls from the refrigerator or freezer. Using a fork or a specialized dipping tool, gently submerge each ball into the melted chocolate, ensuring it's fully coated. Lift the ball, tapping the fork gently against the side of the bowl to allow any excess chocolate to drip off. Return the coated balls to the parchment-lined sheet. Pro Tip: Work in small batches to ensure the chocolate stays warm and fluid. If your chocolate starts to thicken, gently reheat it.
Step 5: Set and Enjoy
Allow the chocolate coating to set completely. You can do this at room temperature (which might take an hour or two) or by popping them back into the refrigerator for about 15-30 minutes for faster setting. Once the chocolate is firm and no longer tacky to the touch, your *chocolate peanut butter balls* are ready to be devoured!
Pro Tips for Success & Storage Secrets
Elevate your no-bake chocolate peanut butter balls from good to absolutely phenomenal with these expert tips and ensure they stay fresh and delicious for longer.
Perfecting Your Dipping Technique:
- The Ideal Ball Consistency: Your peanut butter balls should be firm, but not rock-hard frozen when dipping. If they’ve been in the freezer for a while, take them out 5-10 minutes before dipping for easier handling and to prevent the chocolate from setting too quickly and unevenly.
- Use the Right Tool: A standard dinner fork works wonders. For even cleaner results, invest in a chocolate dipping fork or a set of candy-making tools.
- Thin, Even Coat: After dipping, tap the fork gently and quickly against the side of the bowl. This helps excess chocolate drip off, ensuring a thin, even, and beautiful coating without pooling at the bottom.
- Keep Your Chocolate Warm: Melt your chocolate in smaller batches or keep your main bowl of chocolate over a very gently heated water bath (double boiler style) to maintain its fluidity.
- Optional Embellishments: For an extra touch of gourmet, sprinkle a pinch of flaky sea salt on top of the wet chocolate, or drizzle with contrasting melted chocolate before setting. Chopped peanuts also make a delightful garnish!
Optimizing Storage for Freshness:
These delectable treats are fantastic make-ahead desserts. For even more in-depth preparation and storage advice, be sure to check out our guide on Mastering No-Bake Chocolate Peanut Butter Balls: Prep & Storage Tips.
- Refrigerator Storage: Store your finished chocolate peanut butter balls in an airtight container in the refrigerator for up to 1 week. For best results and to prevent sticking, layer them with wax paper or parchment paper between layers.
- Counter Storage: If consumed quickly, they can be kept at cool room temperature for up to 3 days. However, for the best texture and freshness, refrigeration is recommended, especially in warmer climates. They are often best when slightly chilled!
- Freezing for Long-Term Enjoyment: These freeze beautifully! Arrange them in a single layer on a parchment-lined tray and freeze until solid. Then, transfer them to a freezer-safe zip-top bag or airtight container. They will stay fresh for up to 2 months. The best part? There’s no need to thaw before eating; they’re incredibly delicious straight from the freezer for a frozen treat!
- Serve at the Right Temperature: While delicious chilled, bringing them to room temperature for 10-15 minutes before serving will yield the softest, most melt-in-your-mouth peanut butter center.
- Avoid Strong Odors: Chocolate is notorious for absorbing odors. Store your *chocolate peanut butter balls* away from strong-smelling foods in your refrigerator or freezer to maintain their pure, delicious flavor.
These easy no-bake chocolate peanut butter balls truly embody the best of both worlds: gourmet taste with minimal effort. They're a testament to how simple ingredients can create something profoundly satisfying and utterly irresistible. So, whether you're a seasoned baker or a kitchen novice, these 5-ingredient wonders are your ticket to sweet success. Dive in, get creative, and enjoy the pure joy of homemade peanut butter and chocolate bliss!
